If you have a view or reports that you wish to run in different timezones, so that the data reflects the timezone of the person running the report, this can easily be achieved by using the Timezone converter, which is applied to a field at the view level.
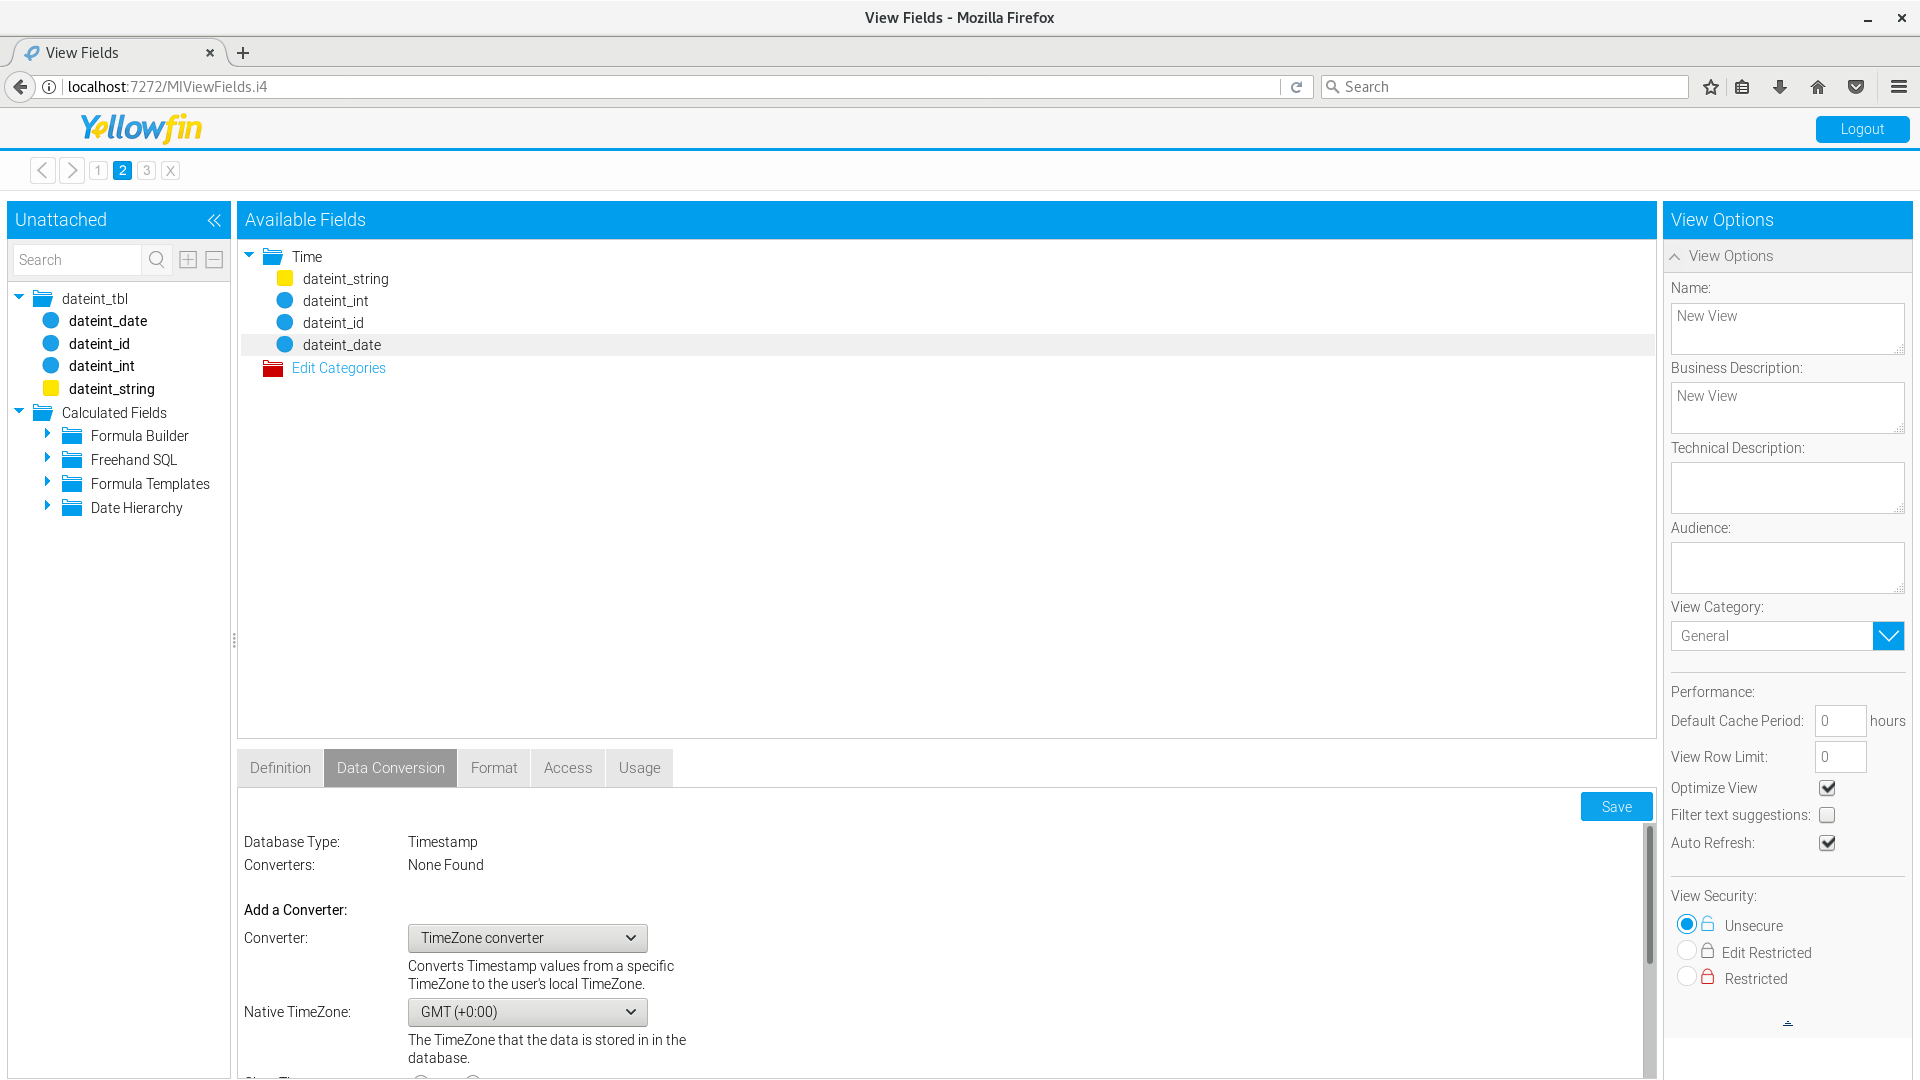
On Step 2 of the View Builder (View Fields), select the field you want to convert.
note: The TimeZone converter will only be available for Timestamp (datetime) fields.
All date fields in SQL Server are timestamps, but for this to work properly the field should contain both date and time information - i.e. if all values are just a date, with the time component set to 0:00:00, the timezone conversion doesn't make much sense.
Yellowfin 7.2 -
When you edit a field in the view builder you will see a new tab called Data Conversion. On this tab you can apply "Converters" based on the data type for the selected field. For a Timestamp field, you can select the TimeZone converter, and choose the native timezone that the data is stored in. Make sure you click the Add button at the bottom of the window to apply the Converter, and then save the field, and activate the view.

Yellowfin 7.3 -
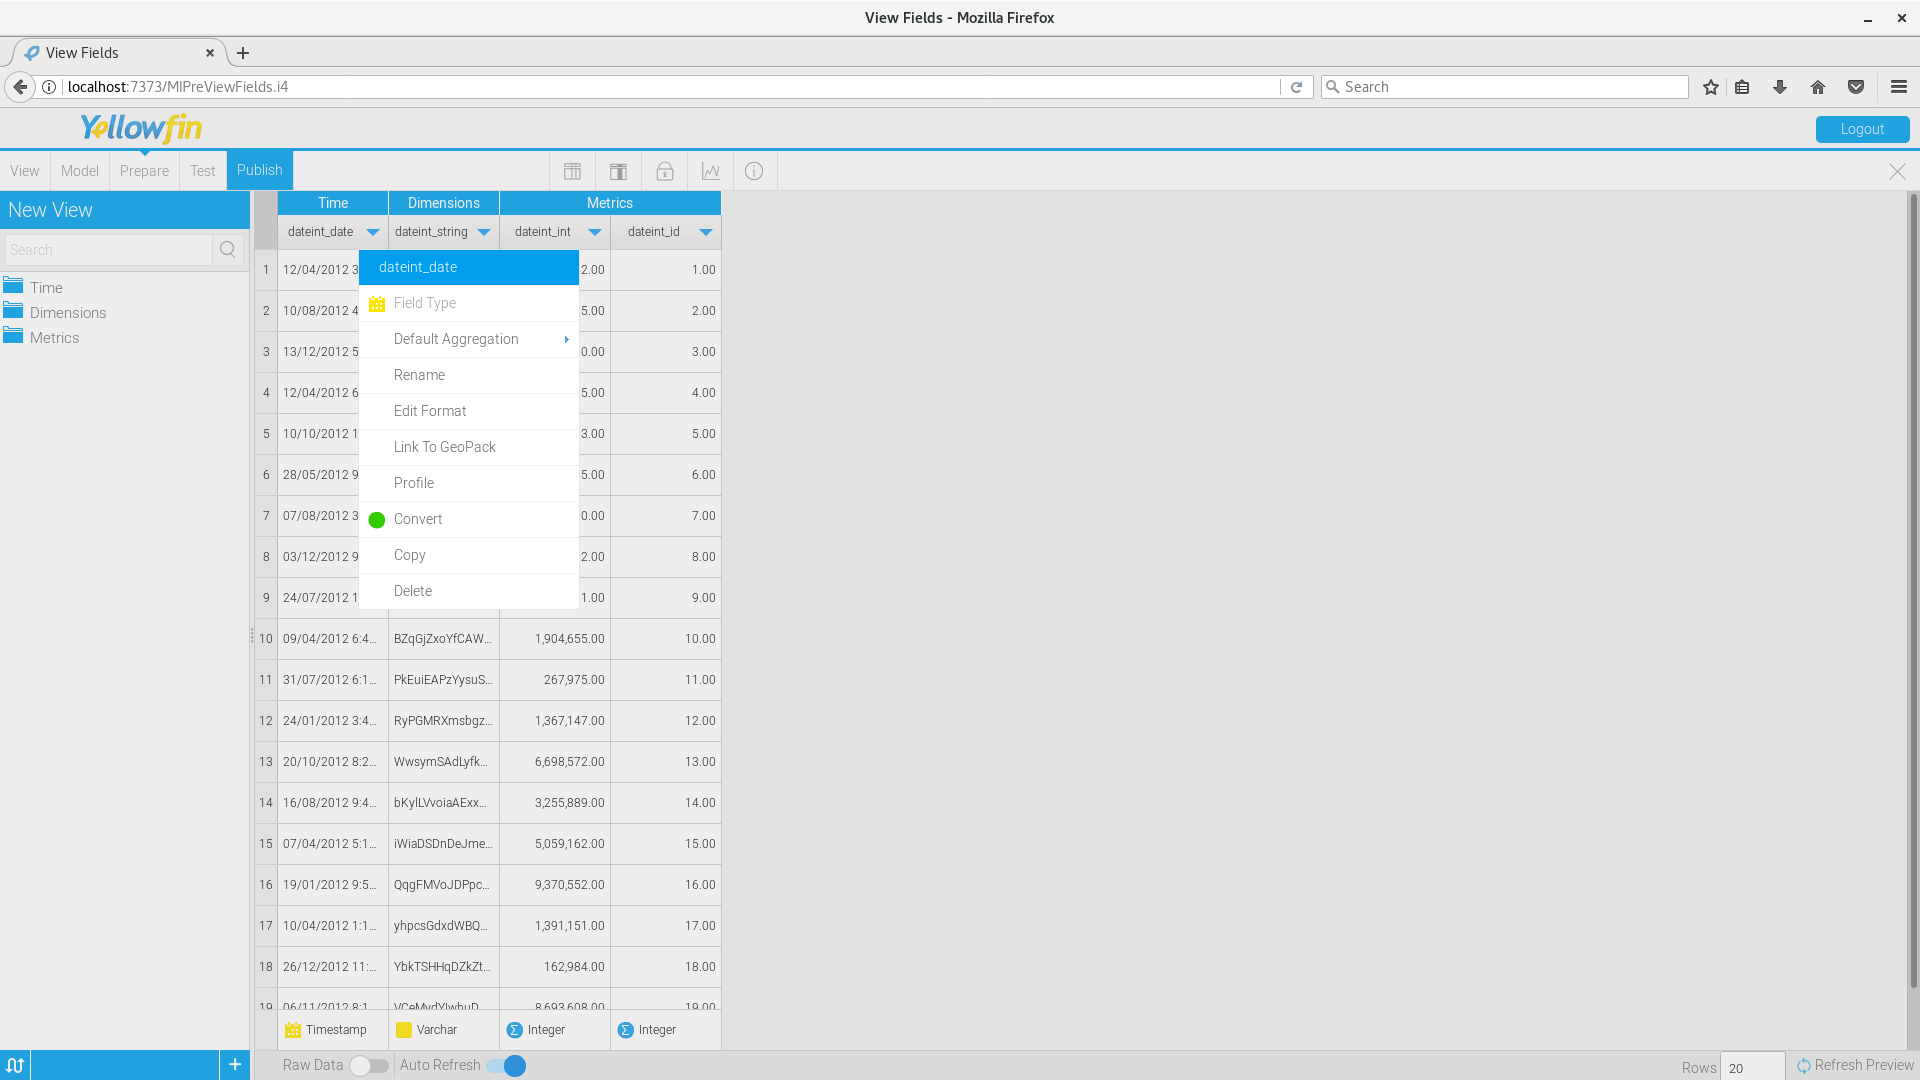
In Yellowfin 7.3 the View Builder is a little different. You'll want to apply your time zone converter from the Prepare stage of the View Builder. From this screen, you simply need to click the arrow next to the column title to apply a Converter.

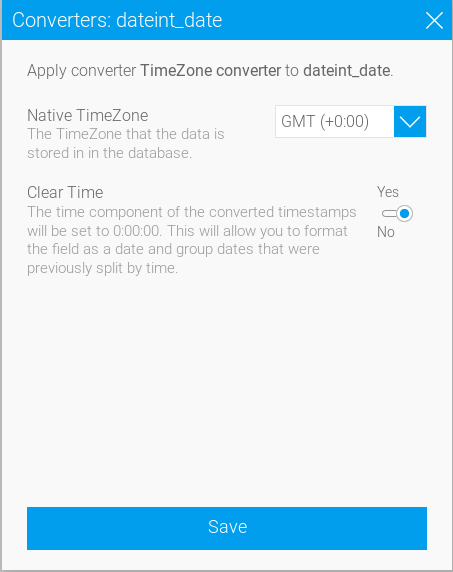
After clicking Convert, you'll be prompted with additional screens that will guide you through applying your Converter, in this case time zone:

Now when you use that field as a column in a report, it will be converted from the native timezone you selected to the user's own timezone.
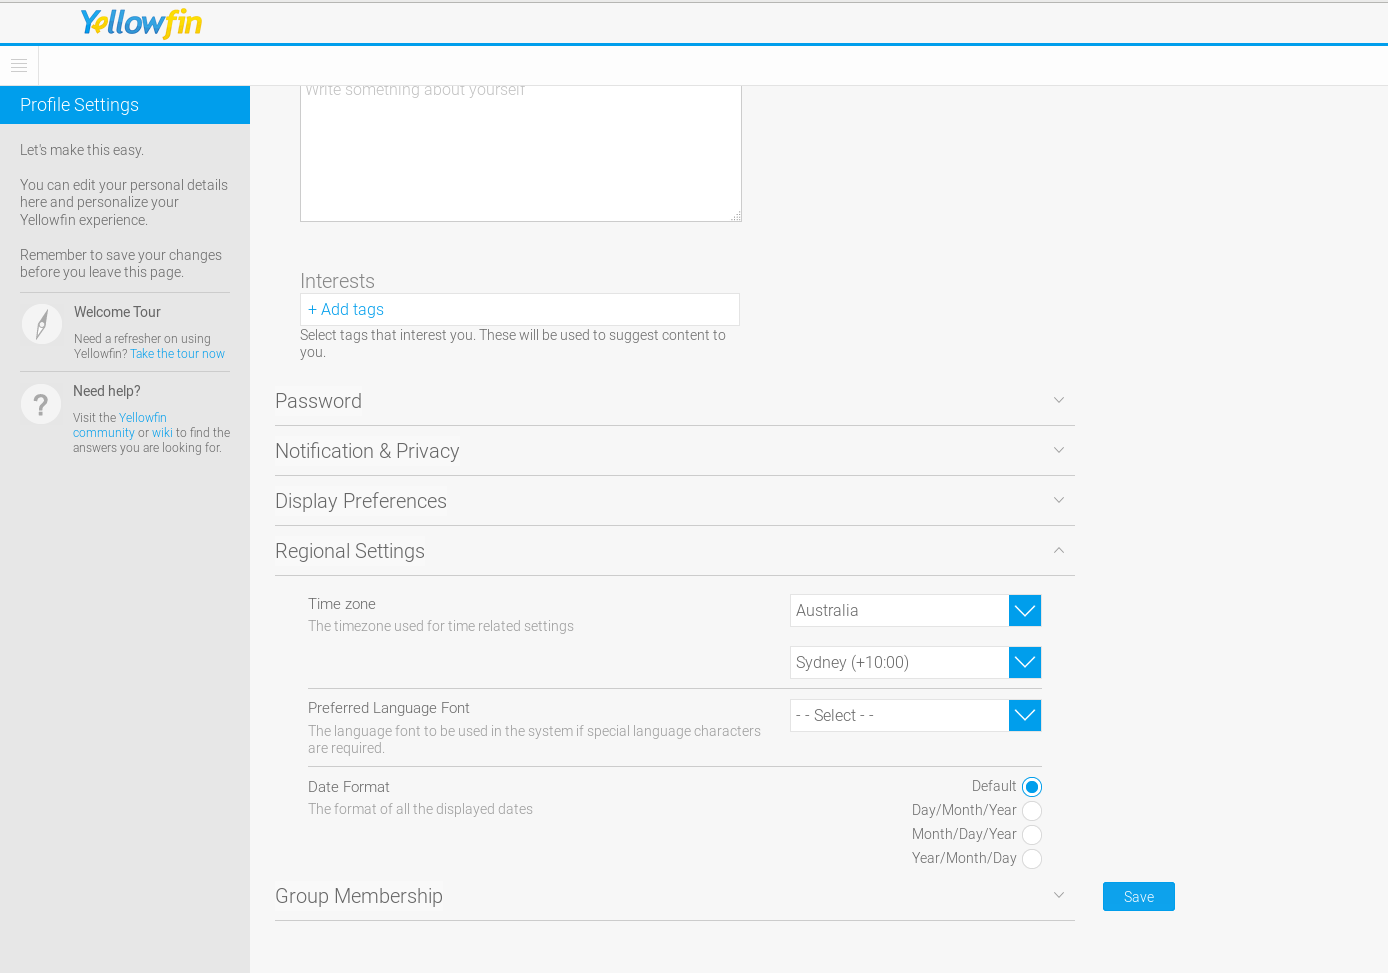
You can change a user's timezone through the System Admin <
User Profile < Regional Settings.

Note:
Also, when using this field as a filter in a report, the filter values will be applied based on the user's timezone setting. The selected filter value will be converted back into the native timezone before it is inserted into the query sent to the database.
