

This article offers more detail on the process of implementing LDAP Authentication in your Yellowfin instance. Before starting, please review the LDAP Connection Settings to better familiarize yourself with the requirements.
You can find links to more LDAP related tasks at the bottom of this article.
Active Directory
I'll start by giving a quick run-down on the Active Directory instance I'll be authenticating against.
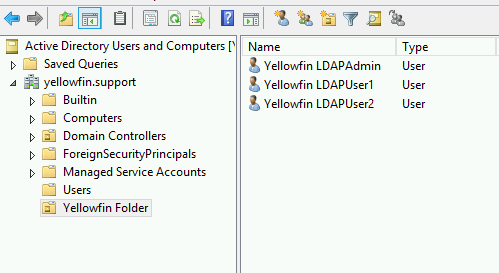
I've created a domain called yellowfin.support on my domain controller. Furthermore, I've created a folder in which I'll store the relevant users and groups that I want to allow Yellowfin access to. This is an Organization Unit (OU), or folder, called Yellowfin Folder.
Yellowfin
I'll start by enabling LDAP Authentication under "Administration" > "Configuration" > "Authentication" (padlock icon) > "Authentication Method":
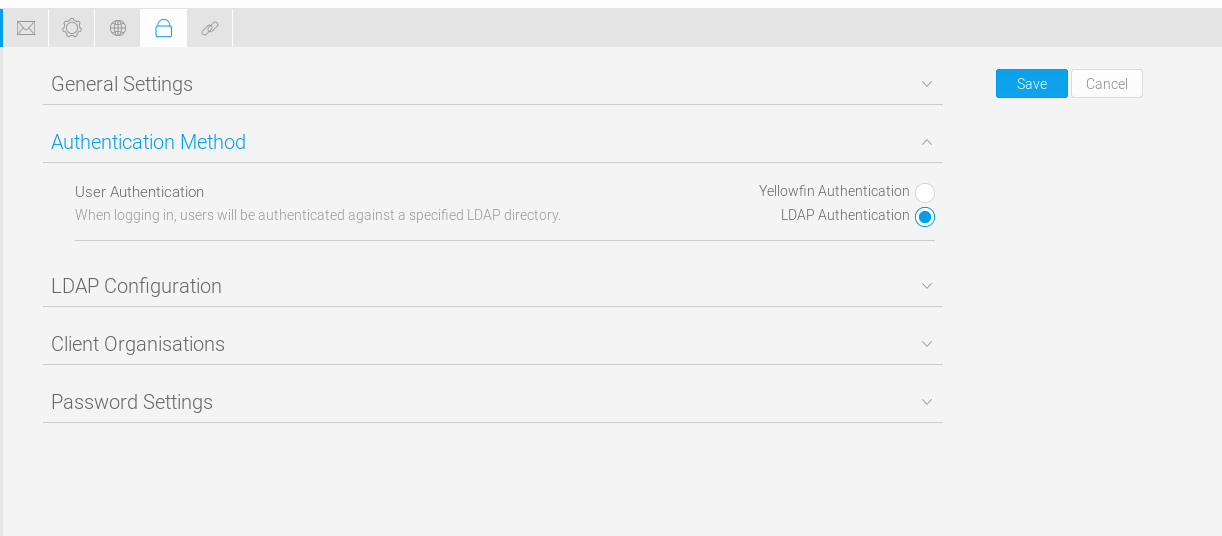
This provides the "LDAP Configuration" section. Let's go ahead and expand that. The settings here should hopefully be familiar, if you've reviewed the article linked in the introduction of this tutorial. I'll address them individually in accordance to my environment.
LDAP Host
This should be pretty clear. You'll want a hostname or IP that identifies your AD server. In my case, I'll use local IP Address of my test LDAP server.
LDAP Port
Unless you've made custom changes to your LDAP configuration, this will use 389 for normal LDAP connections or 636 for encrypted LDAP connections.
Encryption
This will denote whether or not your LDAP connection needs to be encrypted. If you're unsure, consult your IT Administrator.
LDAP Base DN
Now we're getting in to the meat and potatoes of our configuration. The description of this can be confusing so we'll make this concise and simple. This tells Yellowfin where to start its recursive search of the LDAP directory. Meaning if you're not planning on putting all of your Yellowfin users in one group, you'll want this to be your base domain. In my case I'll use the following value to set this:
DC=yellowfin,DC=support
LDAP Group
This is the way you'll tell Yellowfin, "yes this user has access". I've created a 'YFgroup' group in AD that users will be assigned to in order to allow them access to the Yellowfin server. This is a global, security group.
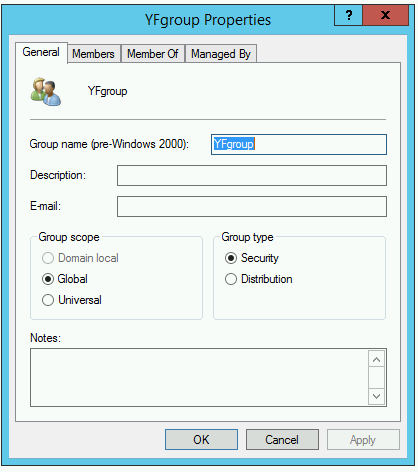
The following value will tell Yellowfin to verify the existence of a users membership to this group before allowing access:
CN=YFgroup,OU=Yellowfin Folder,DC=yellowfin,DC=support
This is interpreted as CN=group, OU=folder group is in, and DC is your domain setting from your LDAP Base DN setting.
LDAP Bind User
This is the username of a user with the correct rights to search your LDAP direcotry. I've used my admin credentials for this test, which is NOT recommended. If you're unsure how to create such a user, contact your IT Administrator. Note that this username needs to be in either NETBIOS or full domain format. In my case I will use either of the following lines for the value of my bind user:
Administrator@yellowfin.support
YELLOWFIN\Administrator
LDAP Bind Password
The password to authenticate as the above user. You must click 'Update Password" before testing your settings.
LDAP Search Attribute
This will be dependent on whether you're using email or userid for Yellowfin authentication. The default setting is email, so we'll presume this for the purpose of this tutorial. If you're not familiar with LDAP Attributes, open the properties box of an LDAP object and have a look at the 'Attribute Editor' tab. You can use the 'Filter' button to select 'Show only attributes that have values' to make it easier to sort through your options. Also, many of these attributes can be set to a value of your choice.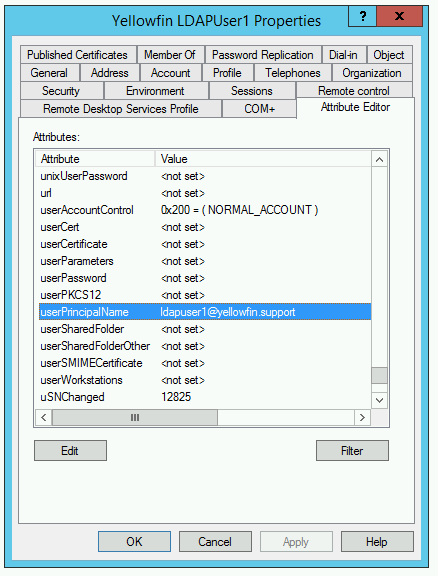
As you can see, 'userPrincipalName' contains the email address of my LDAP User. Since my Yellowfin is configured to use email addresses in authentication, I'll use this for the value of LDAP Search Attribute. This is because the value provided by the user on the login screen is the value Yellowfin will use to search the LDAP directory. This value is entered in it"s simple format:
userPrincipalName
LDAP First Name Attribute
Yellowfin requires a first and last name for users. Review your attributes and find the first name value, in my case it was 'givenName'.
LDAP Last Name Attribute
As stated above, last name is required. In my case, the attribute 'sn' contained the last name, or surname, of the user.
LDAP Role Attribute
You have the ability to set a user's role within Yellowfin PRIOR to their login by using attributes. The default role will be used if this isn't assigned. By default, users brought into Yellowfin via LDAP will have the 'Consumer & Collaborator' role.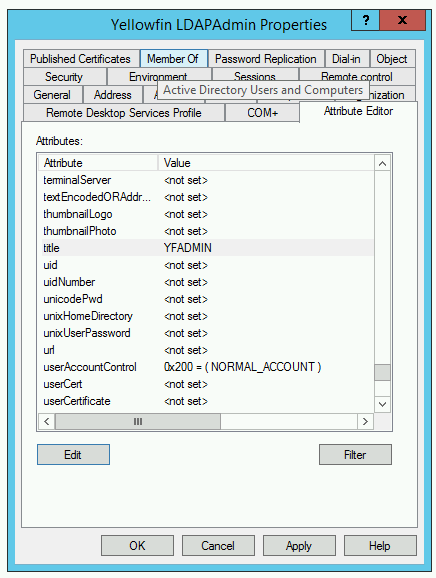
In my case, I've set the 'title' attribute to the value of 'YFADMIN' on my ldapadmin user. I'll enter 'title' as the LDAP Role Attribute.
LDAP Group Filtering Criteria
This setting allows you to filter the LDAP Groups available when you go to pull in your LDAP Groups into Yellowfin. For now, we'll leave this as a placeholder for a future tutorial to be updated soon. I'll be leaving this value empty for the purposes of this article.
Ordering
The final setting here before we're off and running. This setting is important, as it determines how Yellowfin behaves when a user attempts to authenticate to Yellowfin. Generally, you'll leave this set as the default 'LDAP Authentication First'. The alternative would be useful if you keep some internal Yellowfin accounts that you don't want to manage through LDAP.
Here's what my settings now look like:
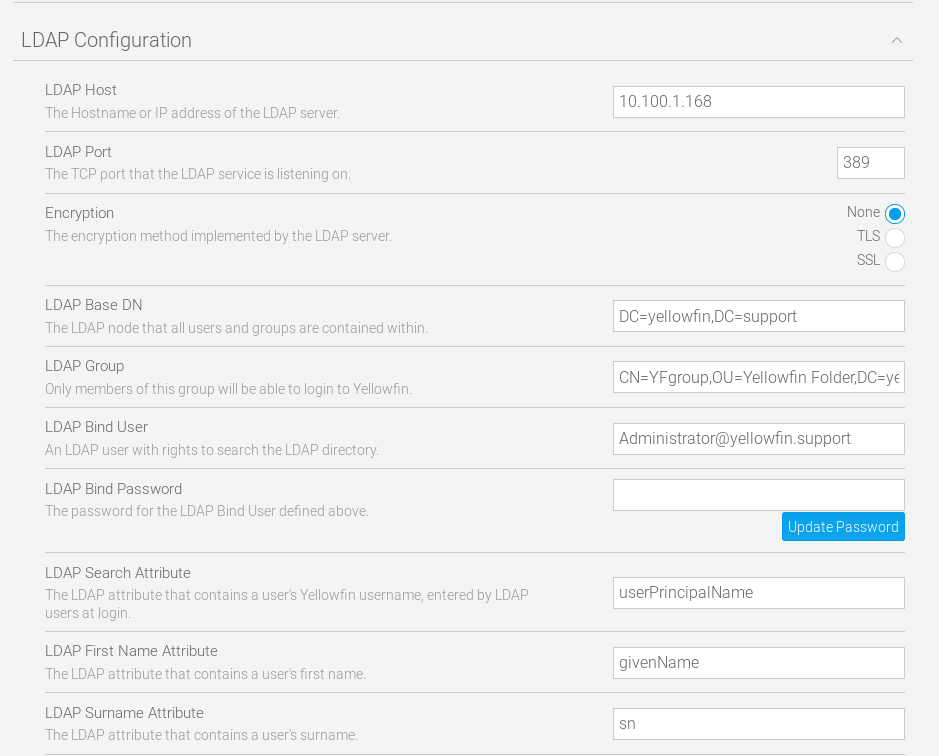
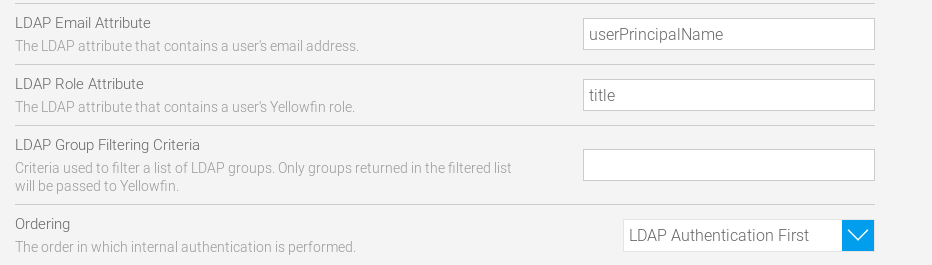
Clicking 'Test' results in success!

Now I'll click 'Save' near the top of the screen and log in as some of my LDAP users, starting with ldapuser1. As I mentioned, my YF is configured for email authentication. I'll enter the email address of my LDAP user to log in:
ldapuser1@yellowfin.support; and then supply my LDAP password for the user.
This creates the user account within Yellowfin, not storing a password. The password authentication is always passed through to your LDAP service.
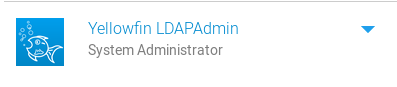
Next, I'll test logging in with my ldapadmin@yellowfin.support account. This is the account that I've set a role attribute for. Upon logging in with this account, you can see that it is automatically given the role that I assigned it in the provided 'title' attribute:
Other LDAP related tasks: